One of the questions we get asked at Just Airsoft Guns is how to correctly install and set up a scope. Most scopes and mounts work in the same way but may or may not have all the functionality we have included in this article. There are many very good scope setup articles online for airsoft rifles but many of our customers find them confusing. So we hope this new ultimate how-to guide will help you set up your scopes correctly and give you many years of shooting fun.
Learning the Parts of Your Scope and Rings
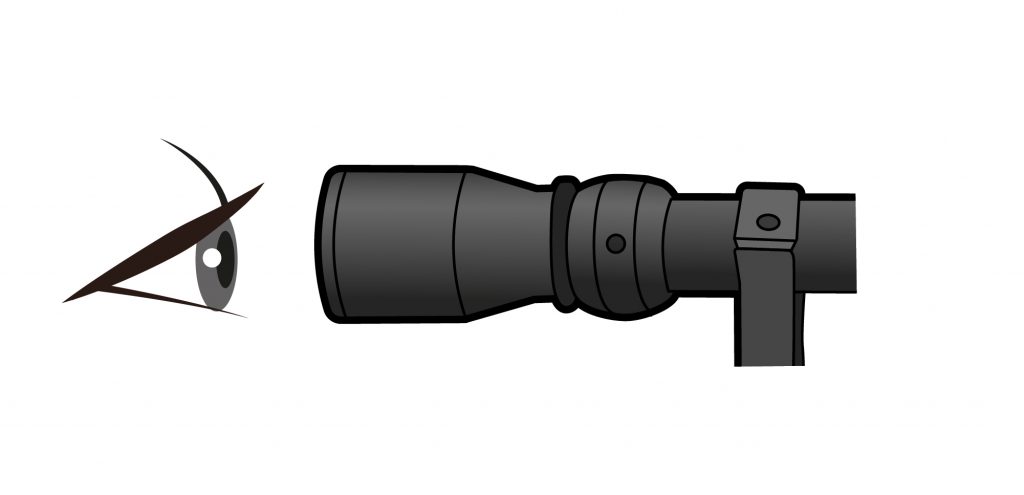
Learning the names of the parts of your scope will help you to understand this setup guide.
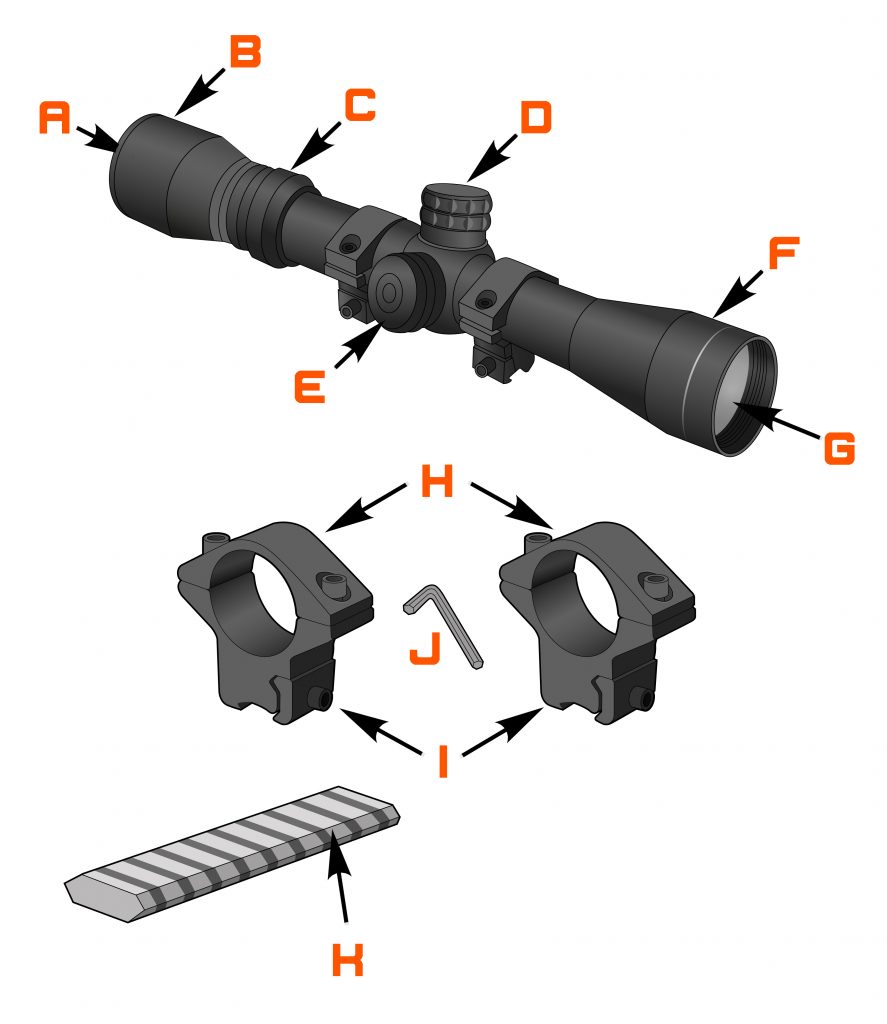
A. Ocular Lens
B. Focus Ring
C. Magnification Ring (on select models only)
D. Elevation (vertical) Adjustment
E. Windage (horizontal) Adjustment
F. Parallax Adjustment Ring (on select models only)
G. Objective Lens
H. Ring Top
I. Ring Base
J. Hex Wrench
K. Picatinny-style rail (not included with scope)
Mounting the Scope
WARNING: ALWAYS ENSURE YOUR AIRSOFT GUN IS ON SAFE, UNLOADED AND UNCOCKED BEFORE FITTING THE SCOPE. ALWAYS PRACTICE SAFE HANDLING OF GUNS AT ALL TIMES.
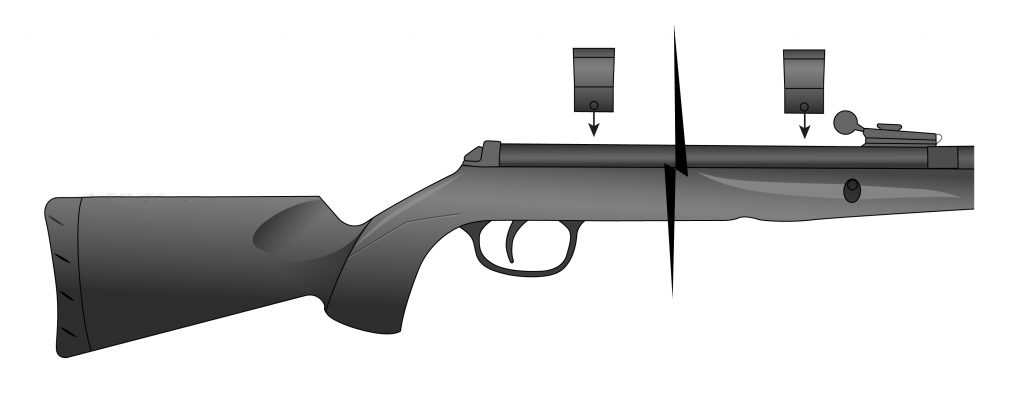
A. Attach ring bases to your mounting rail; tighten base mounting screws using the hex wrench.
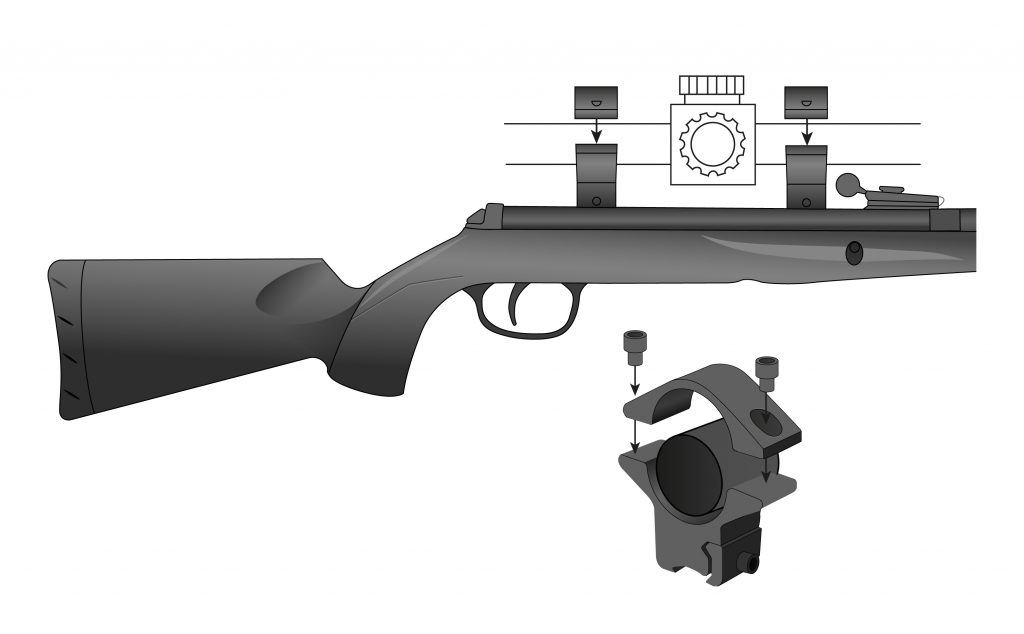
B. Set the scope onto the ring bases with the ocular lens towards the rear of the gun.
D. Replace the ring top to each mount and loosely install the screws so the scope can still move freely.
E. Put the gun to your shoulder, in your natural shooting position, and adjust the scope’s eye relief by moving the scope back and forth in the rings, until you achieve a full field of view.
F. When you have found the ideal eye relief, rotate the scope so the reticle crosshairs are level with the horizon.

G. Tighten the ring top screws evenly; making sure each side is evenly gapped. Do not overtighten.
Variable Power Adjustments (on select models only)
Note: Variable power is not available on all models. If your gun comes with a 4x32mm scope, this is a fixed power scope and you are not able to adjust the magnification. To change the magnification, simply rotate the magnification ring to align the desired magnification with the index dot.
Focus Adjustment
A. With the gun pointed in a SAFE DIRECTION, look through the scope with the eyepiece 3 inches away from your eye.
B. To sharpen the crosshair turn the focus ring clockwise and/or counter-clockwise until the view appears clear.
Adjusting Parallax (on select models only)
Note: Adjusting the parallax is only available on specific scope models. Rotate the parallax adjustment ring to the desired distance setting until the target is in the sharpest focus and the center of the crosshair stays on the target while you examine the image by slightly moving your head.
Zeroing the Scope
The purpose of zeroing the scope is to ensure that the scope is aligned with the impact point from the rifle.
A. Place a target away from you.
B. Ideally use a steadying device such as a bipod or shooting stand, aim at the center of the target, and fire three test shots, if safe to do so.
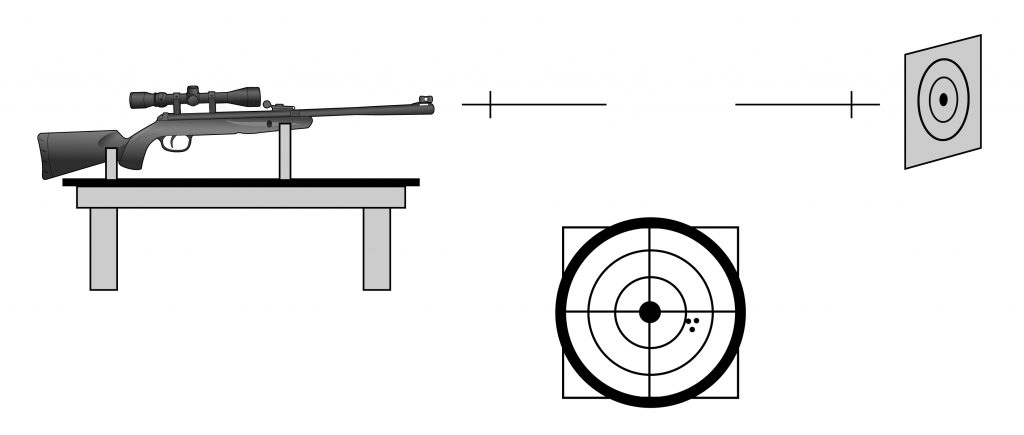
C. If the impact point is exactly in the center of the target then the scope is zeroed.
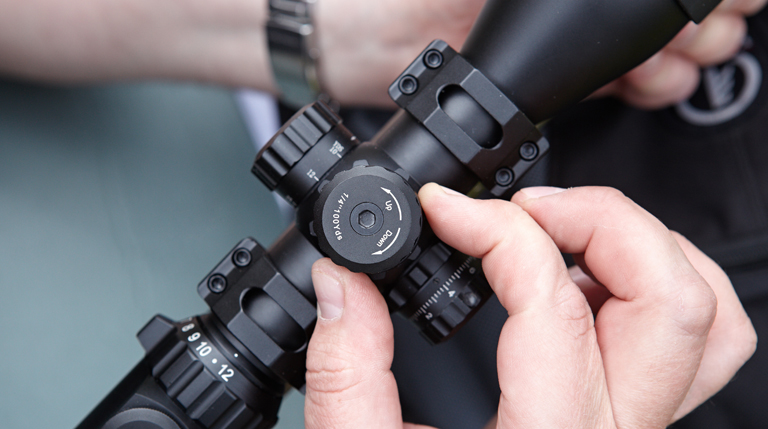
- If it is not, you will need to adjust the reticle using the elevation and/or windage adjusters.
- If your scope comes with turret caps, you will need to remove the caps from the windage and elevation dials before making adjustments.
- Horizontal Adjustment (Windage) – The windage adjustment wheel will move the impact point left or right.
- Vertical Adjustment (Elevation) – The elevation adjustment wheel will move the impact point up or down.
D. Having adjusted the windage and elevation as required, fire, if safe to do so, another three test shots. Keep adjusting and test firing until the test shot impacts on the center of the target when the reticle is on the center of the target. This is vital for accurate shooting.
E. Once the scope is zeroed, be sure to put the windage and elevation caps back on.
Maintenance
- Wipe the lens with a dean flannel doth to keep it clean and dry. Do not use your finger or fingernail to touch or dean lenses.
- Use only a clean flannel doth for cleaning.
- Keep the protective lens covers in place when the scope is not being used.
- Store the scope in a cool dry place when not in use.
- Be careful to avoid contact with acid, alkaline or corrosive chemicals.
- Do not attempt to lubricate any part of the scope. Take care not to drop or knock the scope once it is zeroed.
- Do not disassemble the scope. Do not loosen or remove any screws or parts. Any such or similar actions will void the warranty.